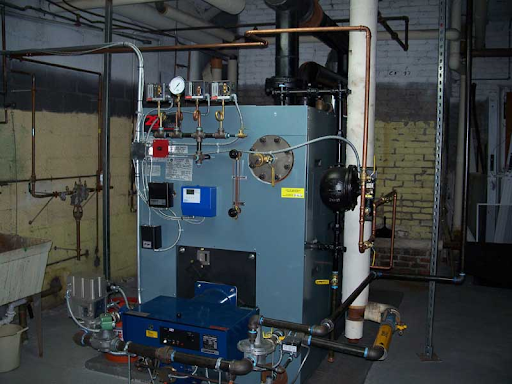
Smith Cast Iron Boilers aren’t called “A Legend in Heating” for nothing. Smith Cast Iron Boilers is known for making boilers that last a long time and work well. Anyone who knows about boilers will tell you that HB smith 28 series boiler is built to last and work reliably year after year.
Smith has a wide range of boilers made of cast iron. Their products provide heat for everything from small homes to the biggest businesses. Smith Cast Iron Boilers are used by a lot of schools, universities, and government buildings. The company is known for making boilers that are up-to-date and meet the strictest standards. They are the best at research and development, and they have testing facilities to make sure they are always at the forefront of boiler technology.
How to Install HB Smith Boiler
It’s important to install your HB smith 28 series boiler the right way, just like you would with any other boiler. Most places will need to hire professionals to install the boiler.
The Smith 19HE is one of the boilers that people put in their homes the most. It works well for both steam heating and hot water heating systems in light commercial settings.
Before you put your boiler together, you should check each part. You should look for scratches or nicks on all the surfaces that seal the ports. If the port seals or the area around them are damaged, you should replace the damaged parts. Don’t try to use boiler sections where the port seals are broken. If you aren’t sure if the port seal areas have been damaged, have a professional company look at them.
After checking all the parts and pieces, here’s how to put your HB smith boiler together:
- Use a wire brush to clean the grooves in the hydronic gasket and the grooves in the rope. Be careful not to damage the surface of the machine.
- If you are putting the boiler on a flat pad, make sure the center of the boiler is in the middle of the pad.
- If your pad isn’t level, you will need to put shims under the angles to give them more support and make sure the boiler is level. Once the boiler is level, put grout under the whole length to give it more support.
- Put the iron rails in place. They should go in the same direction. The 2 1/2′ side goes on the floor and the 25 -21/32′ spaces between the outsides.
- Angle rails should be put in place. They should be in the same direction and 25-21/32′ apart.
- Place the back part inside the angle iron rails and stand it up. The feet need to be put on. If you need to, you can use support to keep the back from falling.
- Spray glue into the groove for the rope. This will help keep the wicking in place as you put the boiler together. Make sure not to spray glue into the ports for the hydronic seal.
- Don’t bend or twist the wicking when you put it in place. Make sure the ends fit through the hole in the cleanout cover.
- Put the upper hydronic seal in the section with the hole. Be careful not to move either the seal or the rope when you do this.
- Again, be careful not to move the seal or rope as you put the lower hydronic seal into the recess.
- Look at how all of the parts fit together.
- If the sections are lined up correctly, put in the draw rods and tighten the nuts by hand.
- Make sure the sections are level, and then tighten the upper right and lower left draw rods the rest of the way. Use a torque wrench to tighten the draw rods. First, tighten them to 10 ft. lbs., then 25 ft. lbs., and finally 50 ft. lbs. The upper left and lower right draw rods should be left at 10 ft. lb


